Free shipping for orders over $100.00

Enter email for instant 15% discount code & free shipping

credit-card-logos
PayPal Logo

How to Setup The Barking Watch Dog Alarm Add On Sensors & Remote Contols by HomeSafe
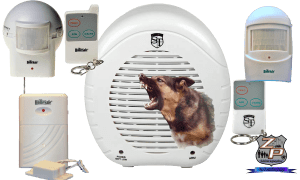
Barking Dog Alarm Package With Sensors And Remote Controls

Updated 08/06/2021

In part two of the setup of the Safe Family Life, HomeSafe, or Streetwise Barking Watch Dog Alarm, we will cover the setup of our available Add On Motion Sensors, Door/Window/Vibration Sensors, and Remote Controls.

These add on sensors are designed to protect a door or room in another area of your structure, to get around a metal object that the main unit cannot see through, or to place in an area that the barking dog unit sees constant movement, such as flags, plants, or animals. They do not sense through objects like the Main Barking Dog Unit does, but they can be placed on the other side of a metal object to send a signal to the main unit to bark, or to use with the Barking Dog Alarm sensitivity turned down which reduces range and movement detection on the main unit.

 It is important to set up and test the MAIN UNIT before you activate the sensors. To learn about setup of the main Barking Dog Unit, Please refer to Part One.

Each of these add on products need to be matched to the Main Barking Dog Unit one at a time before they will work.

Here is a short description of the sensors and remote control we have available. Set up instructions continue below.

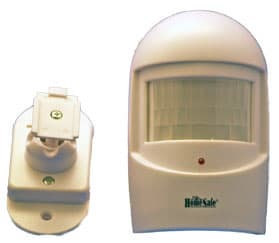
 Homesafe Motions Sensor No Back Ground copy

 The HomeSafe Motion Sensor; Model HA-Motion, is very sensitive and is designed to detect ANY motion in the 8-meter distance and 110-degree angle of detection range of the window.  This non-adjustable sensor runs on one 9 volt battery and has a low battery indicator LED.

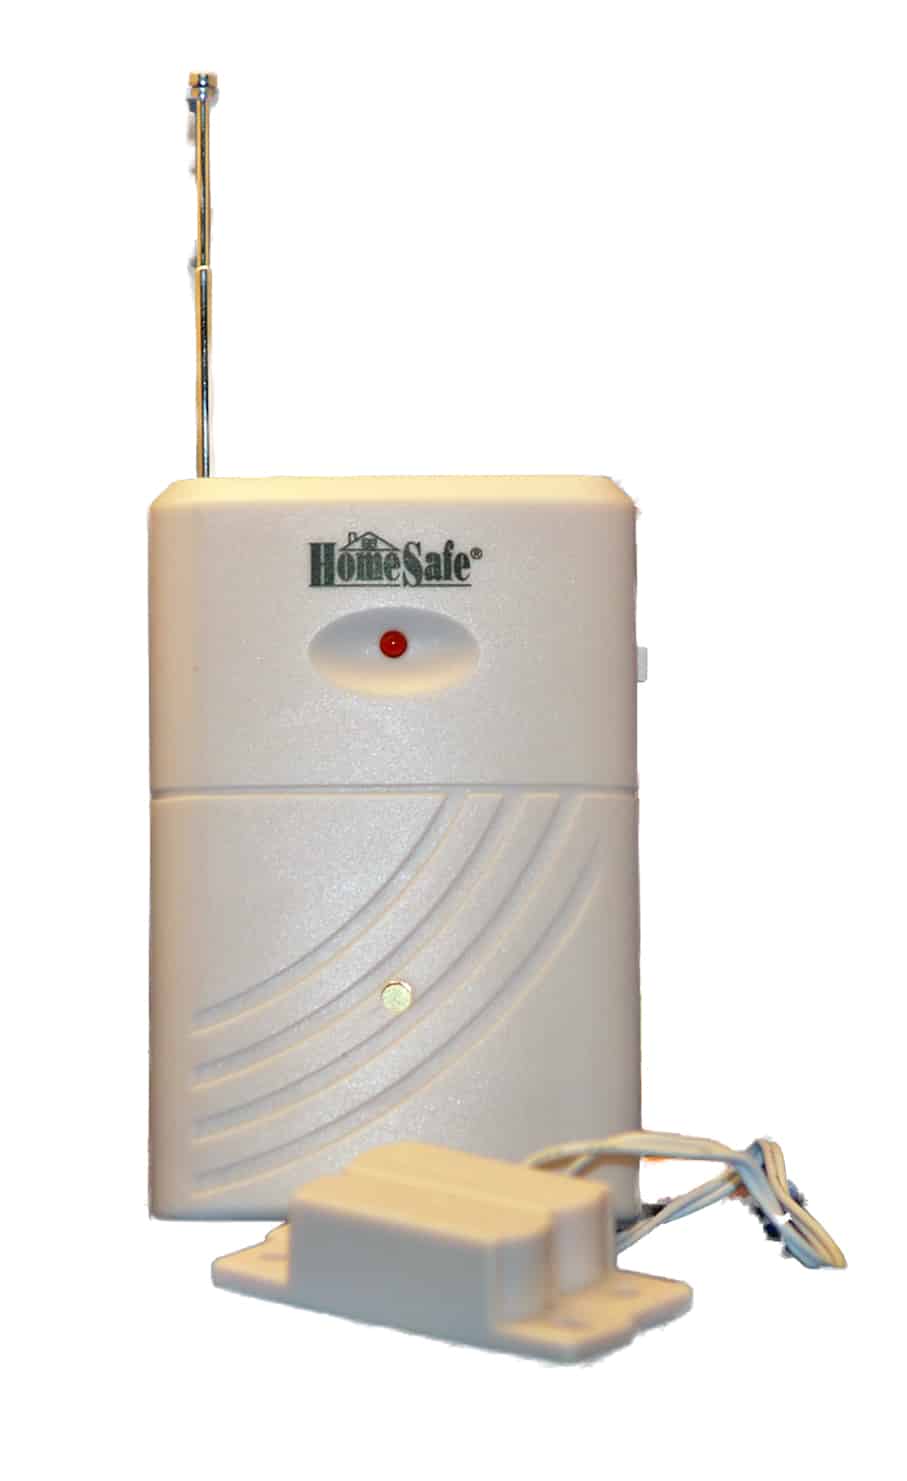
Door Vibration Sensor large forsecuritysake copy

Using a magnetic contact and vibration technology, the HomeSafe Door/Window/Vibration Sensor is a multifunctional product that can cover a door or window, and pounding vibration at the sensor body only. This sensor also has a small internal alarm speaker that can be switched on so the unit can be used independently of the Main Barking Dog Unit. (Extra magnetic contacts not included) can be added by wire in series to cover a number of areas. This sensor runs on one nine-volt battery (not included) and has a low battery indicator LED.

ForSecuritySake Outdoor wireless sensor


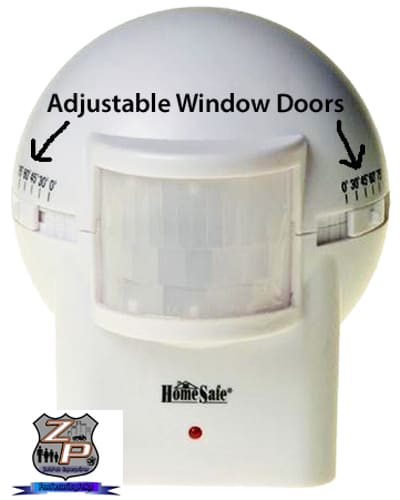
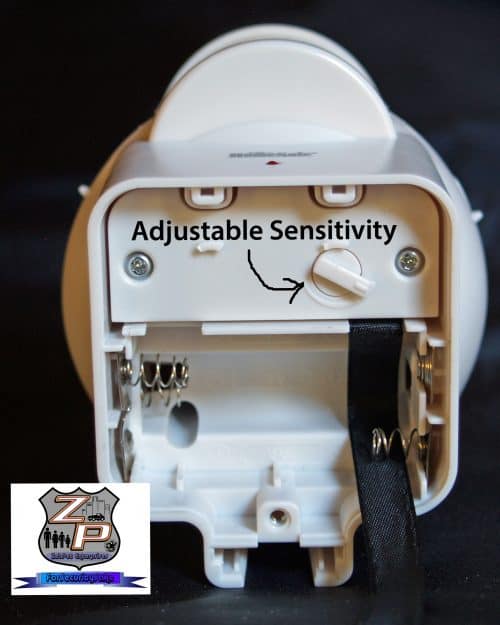
Our newest sensor is the Indoor/Outdoor Adjustable Wireless Home Security Motion Sensor. It has an adjustable distance up to 10 meters away and 150-degree adjustable angle of detection. There are doors on each side of the sensor window to cut down the area it can see and there is an adjustable distance sensitivity control in the battery compartment. Additional information is below under set up. This sensor runs with three long-lasting alkaline AA batteries (not included).


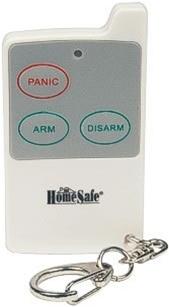
(Fig.3) Remote Control

The Barking Watch Dog Alarm Main Unit comes with one remote control matched to the alarm at the factory. Additional remote controls can be added to the system. These additional remote control(s) have the same function as the one included.


TO SETUP THE SENSORS AND MATCH THEM TO THE BARKING DOG ALARM:


Make sure the Main Barking Watch Dog Alarm is plugged into power and that a fresh set of quality alkaline backup batteries are installed correctly.


Make sure you have set up and tested the Main Unit to your satisfaction in the unit’s current location. If you need to move the main unit to set up the sensors, be sure to mark the location so it can be returned.


Have the Barking Dog Alarm turned on using the volume control, but in the disarmed mode.


Follow the next step for each sensor, one at a time, to be added to your Barking Watch Dog Main Unit. If you already own wireless alarm sensors, make sure only the sensor you are adding is sending a signal. 


Have a fresh good quality 9 volt, or in the case of the outdoor sensor 3 alkaline AA batteries correctly installed in the sensor and have it close to the Barking Dog Alarm. Wait at least one minute after installing the batteries before you attempt to match it.

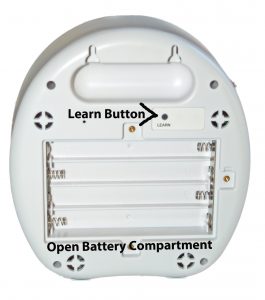
Barking Dog Alarm Open Battery Compartment

Press and hold the Learn button on the Barking Dog Alarm for about 2 seconds. You should hear one beep tone from the barking dog alarm to signify the unit is in learn mode. Depending on which sensor you have, follow the instructions below to make it trigger. You should hear two long beep tones that confirm that the sensor is now matched with the barking dog alarm. If you hear three or four beep tones the setup failed and needs to be attempted again, starting with the learn button on the main unit.


For the Door/Vibration sensor:


With the main unit in learn mode (described above) trigger the sensor by shaking it or moving the magnetic contacts away from each other. You should hear two long beep tones that confirm that the sensor is now matched. (The sensor also has an independent small alarm that can be turned on or off. This independent alarm switch has nothing to do with matching or operation of the barking dog alarm.)


After testing, you can mount the sensor and magnetic contacts.


For the Motion Sensors:


Place the battery/batteries in one motion sensor and wait one minute for the sensor to set up. Place the main unit in learn mode as described above. Trigger the sensor by moving in front of it. You should hear two long beep tones that confirm that the sensor is now matched.


After the sensors are matched to the barking dog alarm you can place each sensor in the area you want it to be, but don’t mount until testing to make sure each sets off the Barking Watch Dog Alarm when triggered. If there are plants or anything that moves in front of the sensor the alarm will continue to bark. You may need to move the object causing the movement, or the sensor to another area. In the case of the indoor/outdoor adjustable sensor, you may be able to use the featured *adjustments to block the movement from the sensor window or reduce the range the sensor detects.

*Adjustments for the indoor/outdoor adjustable sensor:

There are two sliding doors on each side of the sensor that limits the area that the detector sees and an adjustable setting in the battery compartment that adjusts the sensitivity distance that the sensor sees.

Adjustable Motion Sensor Door Adjustment Locations

Use the adjustable window doors to block areas that have the movement you don’t want to trigger the alarm.

Use the adjustable sensitivity in the battery compartment to adjust the distance the sensor can see. Our adjustment tests ranged from about 10 feet to over 30 feet unobstructed.

This adjustment has no effect on the sensitivity of the Main Barking Dog Alarm Unit. That is controlled with the main unit sensitivity switch.

HomeSafe Adjustable Motion Sensor Battery Compartment


Once the alarm works properly with the sensor, you can mount it.


TO SETUP ADDITIONAL REMOTE CONTROLS:


An add-on remote control will allow other family members or employees to control the main unit of the Barking Watchdog Alarm. To setup additional Remote Controls:


Place a fresh button battery in the remote control. (One is included with the remote control.) Place the main unit in learn mode as described above. Trigger the remote control by pressing any of the three buttons. You should hear two long beep tones that confirm that the remote is now matched and ready for use. 


You can add up to 16 total sensors and remotes to the HomeSafe Barking Dog Alarm model 639SR, Safety Technology or SafeFamilyLife model EWD-1, or the StreetWise SWEWD.

 To see more information, or to purchase sensor(s), click here.


We hope you enjoy the Barking Dog Alarm as much as we do.


Return to Part One

Leave a Reply

Your email address will not be published. Required fields are marked *

Here it is!

Enter the below One Time Use Discount Code On Your First Order During Checkout 

                    Not combinable with sales or coupons 

ASWYE79P